Workshops in Chiang Dao, Thailand 2014

Exciting building experiences for you!  This Blog is to introduce you to the three great workshops that we are planning for January and February, 2014.

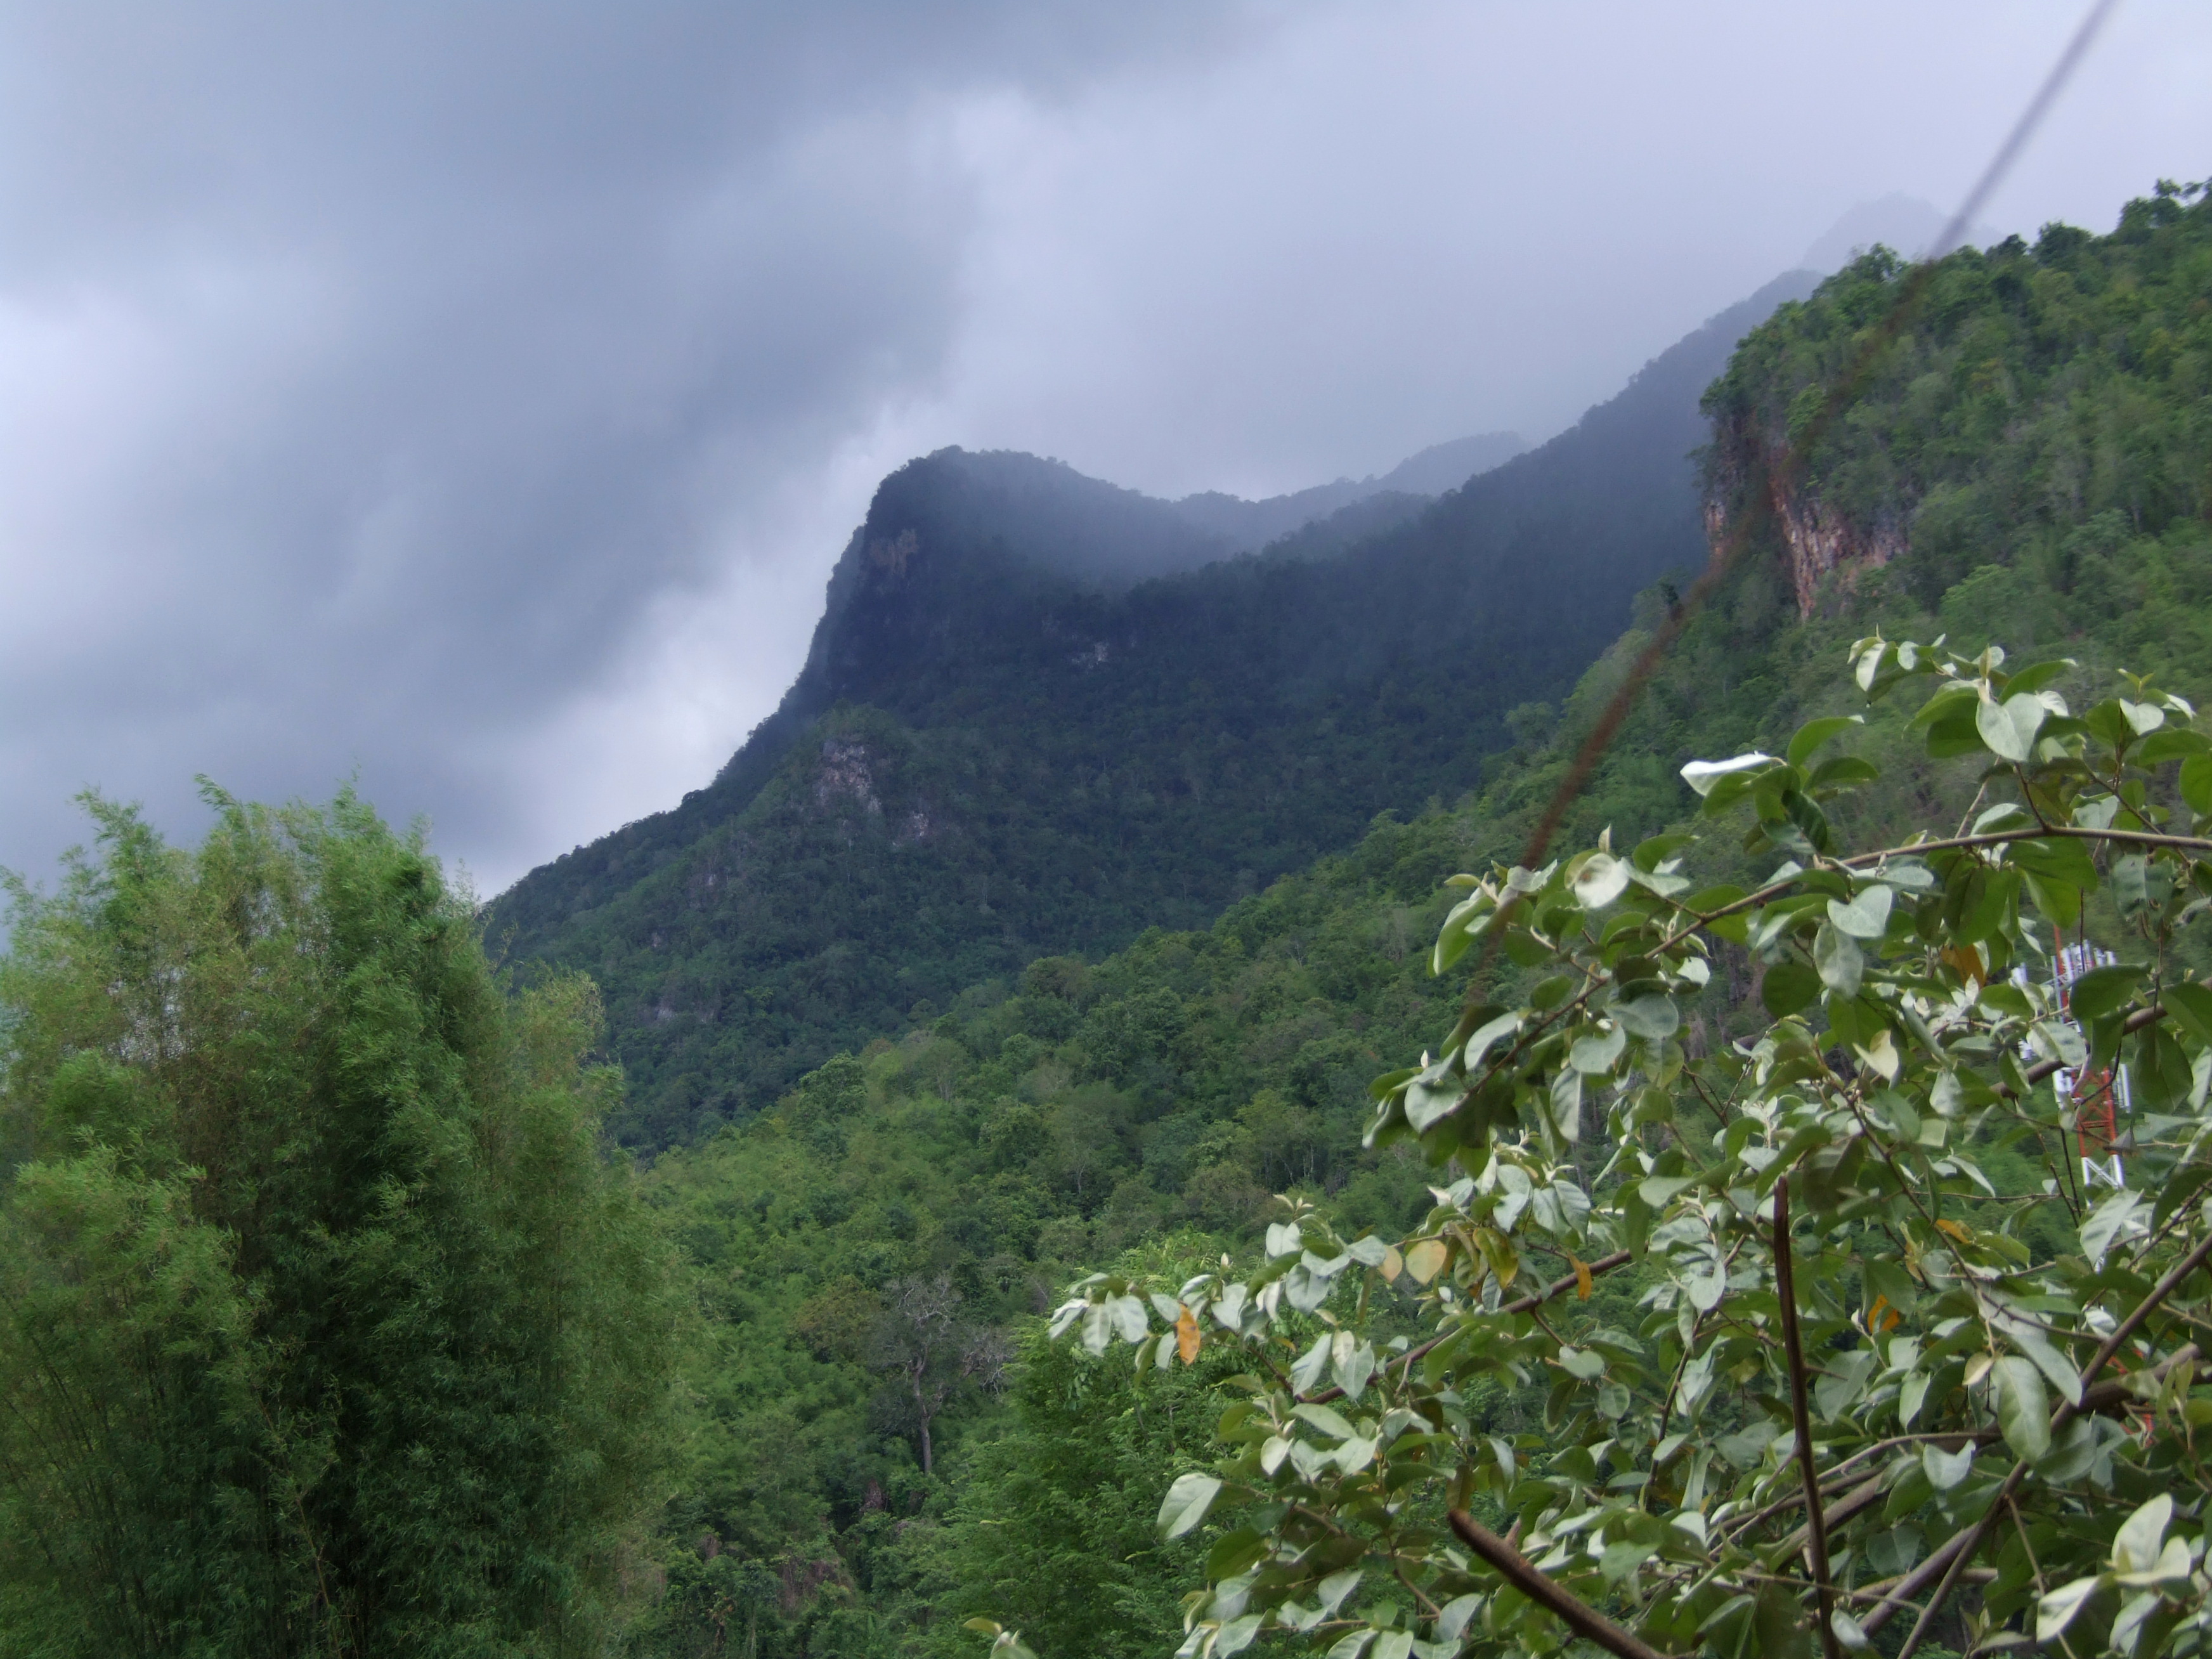
Not only will the building be fun and informative, but you will be living in a village in northern Thailand, an experience in itself.  The local population are friendly and helpful, the scenery spectacular, and the pace of life perfect for de-stressing, relaxing and re-energising.

There will be 3 workshops:

Building a Roundhouse with Maggi McKerron (me!)

6th January to 1st February 2014


Building an Earth Oven with Sally Francis

5th and 6th February 2014


Building an Earthbag Dome with Paulina Wojciehowska

10th to 18th February 2014  

Roundhouse with porch.

Roundhouse with porch.

First Workshop:

A Roundhouse    6th January – 8th February 2014

The first workshop will be to build a roundhouse similar to the photo above, using a mix of local and conventional materials, and incorporating a number of different building techniques.

This is a practical hands-on workshop taught by yours truly, Maggi McKerron, who, as those of you following this blog will know, has been building Roundhouses practically every day since November 2013!

This will be a 4 week workshop, but each week will be separate, from Monday to Saturday.

You can choose which week/s you want to come.  (Excellent discount for those coming for the complete course.)

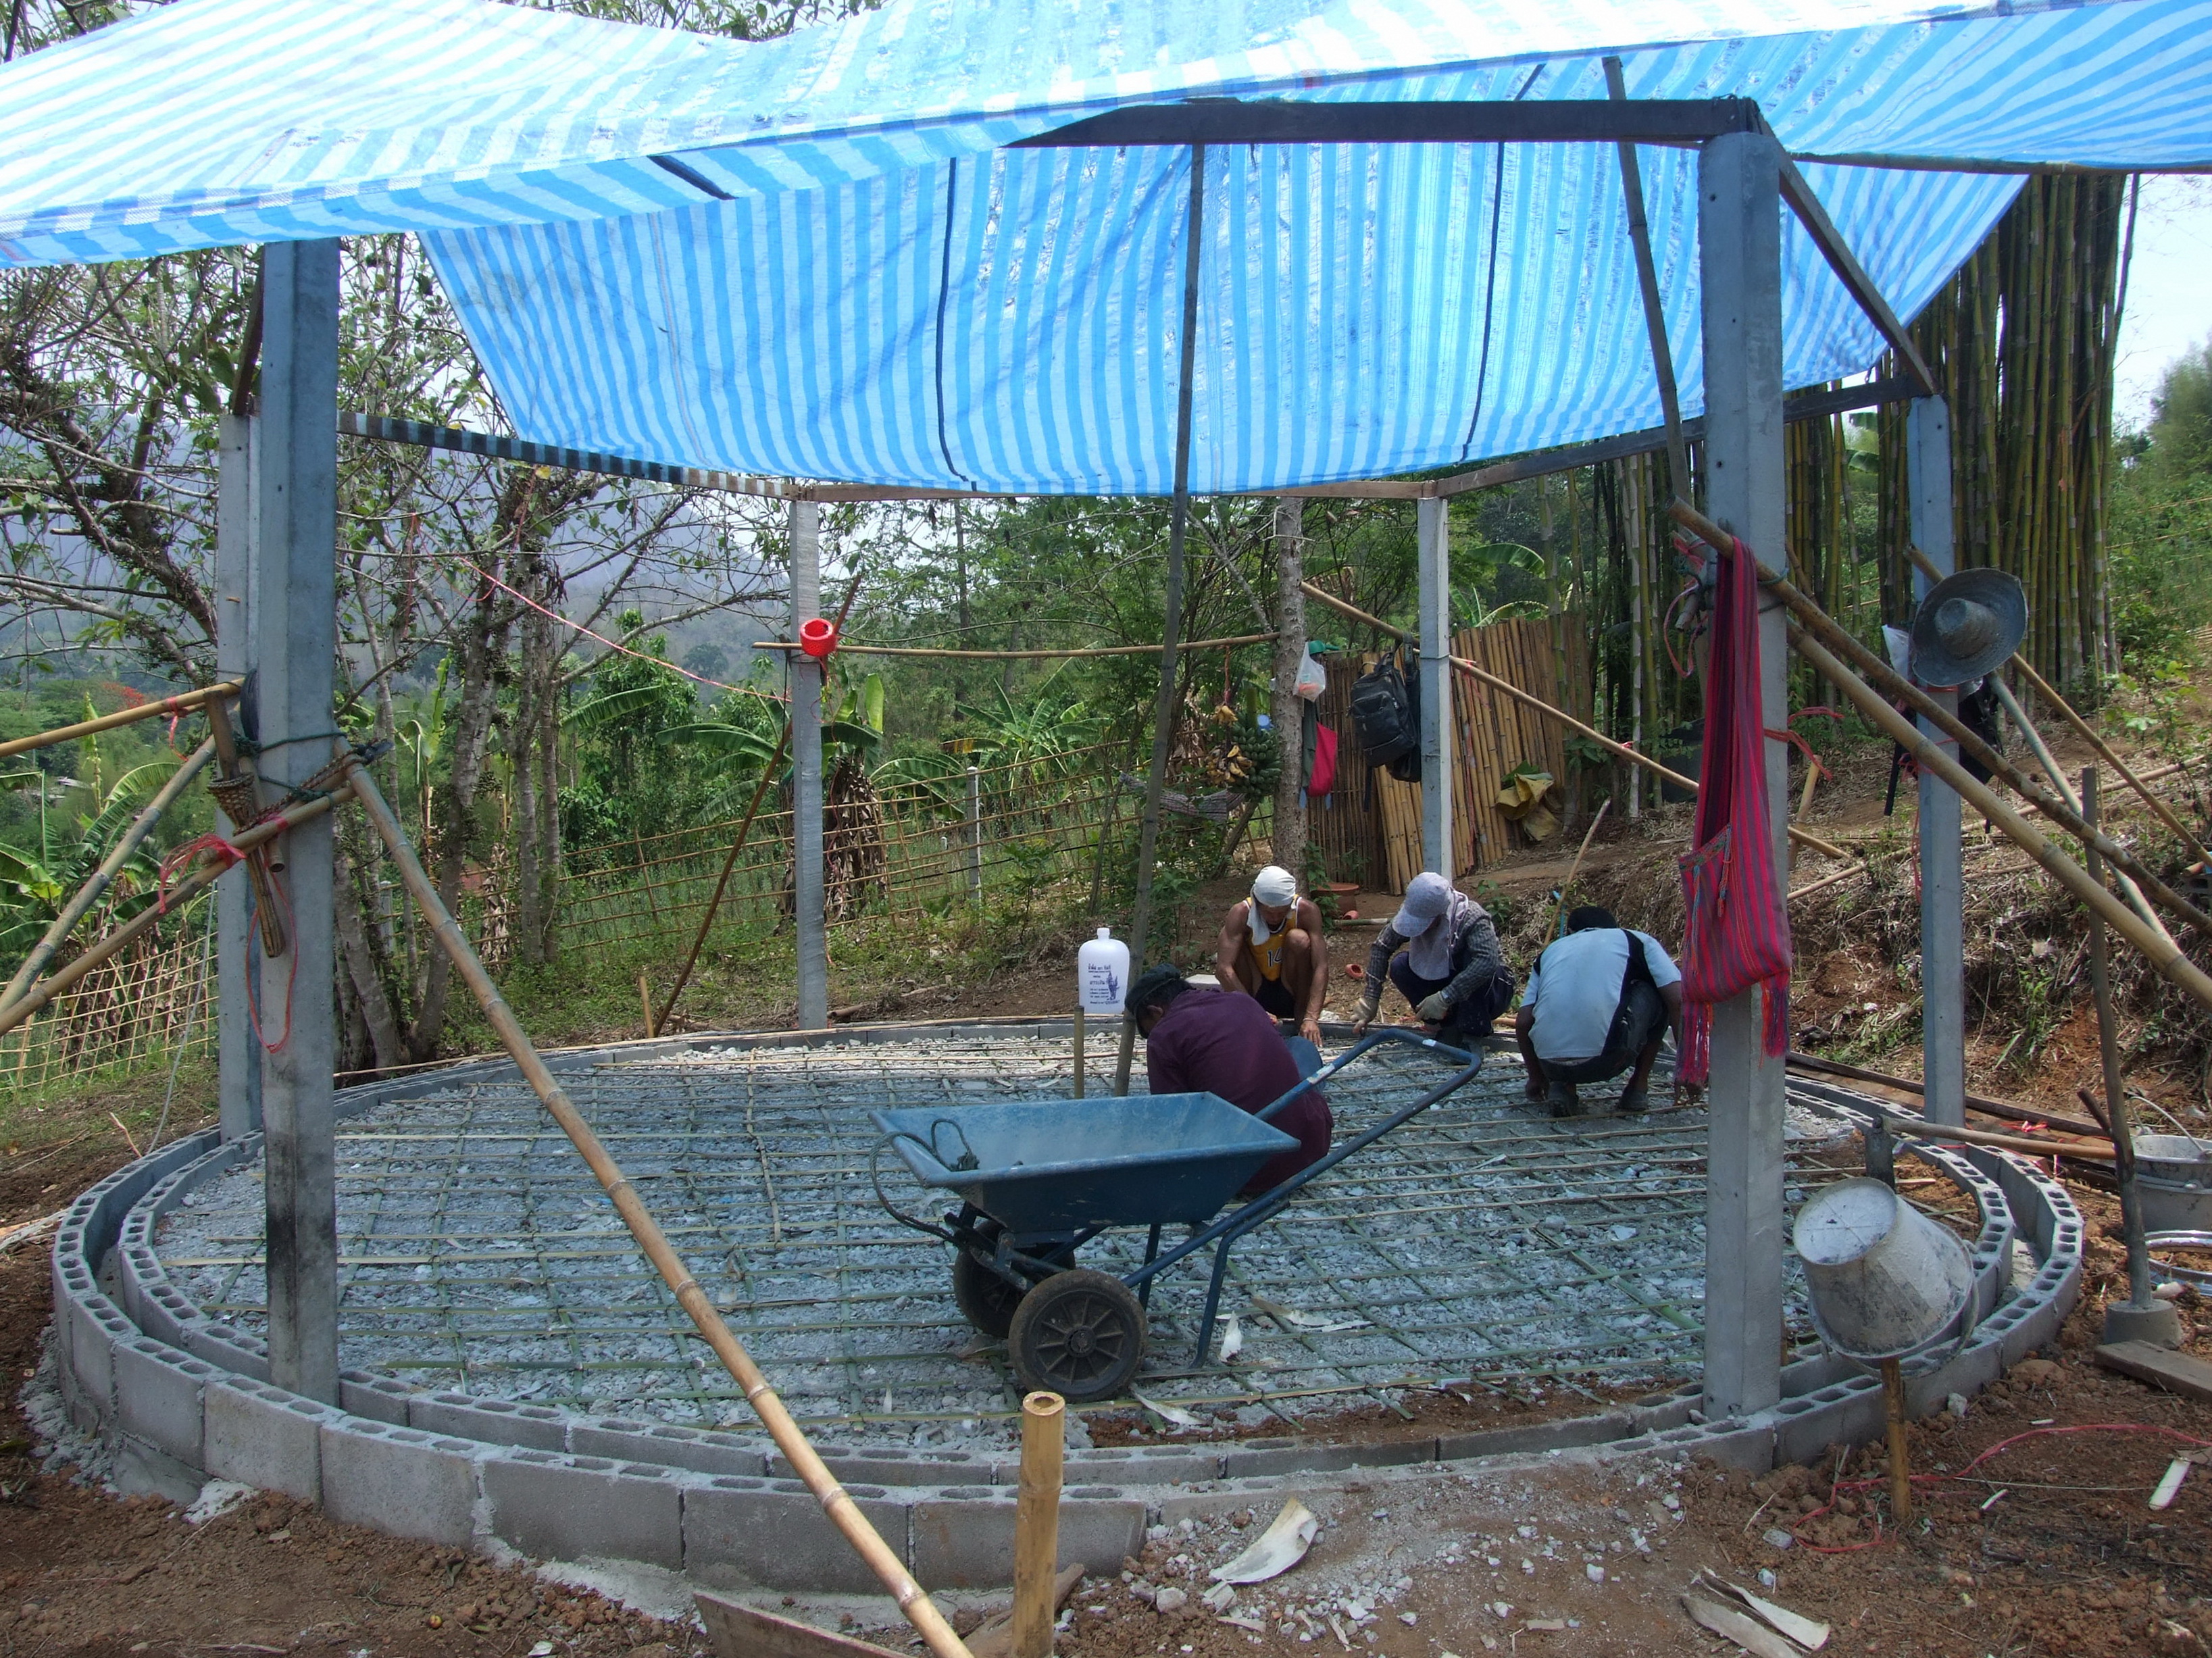
Week One – Foundations                     6 – 11 January 2014

Using local techniques, you will learn to prepare the foundations for a round building on sloping ground, including installing a French drain, concrete and bamboo base.

Using a tube full of water to find the level for the foundation.

Using a tube full of water to find the level for the foundation.

Week Two – Birdcage                        13 – 18 January 2014

We will build a ‘birdcage’ of bamboo and set in the windows and doors.

Building a ‘birdcage’ on which to attach walls and roof

Building a ‘birdcage’ on which to attach walls and roof

Week Three – Walls and Roof           20 – 25 January 2014

Learn how to make thatch using long thin leaves folded over a thin piece of bamboo.  We will then attach the thatch to the roof.  The walls will be made by attaching bags of rice husks to the “birdcage’.

Preparing bags to make the wall.

Preparing bags to make the wall.

Week Four – Plaster                         27 Jan – 1 Feb 2014

Get muddy!  We will cover the bag walls with a mix of earth and straw.  If there is a delay in drying before a fine plaster can be added, there are other buildings on which we can learn about earth plaster finishes.

Filling gaps between the bags with a mixture of mud and straw.

Filling gaps between the bags with a mixture of mud and straw.

After the workshop:   You will be welcome to stay on and help with the finishing off, and putting in the mosaic floors and decorations.  (Pay for food and accommodation only.)   Bring your imagination to suggest and execute decorations!

Mosaic step by Su Lupasco Washington.

Mosaic step by Su Lupasco Washington.

Warning!  This is a natural building, people-power only (no machines) and things happen – weeks could overlap.  For example, it could rain which could make the foundations take longer.  The ‘birdcage’ might be finished before the end of the Week Two.  BUT we will not start on the thatch until the beginning of Week Three, so that people arriving for that week will be sure to get the experience they expect.  A ‘week’ might be 5 – 7 days.

Cost:

One week workshop £150  (Discount for all 4 weeks £500)

EARLY BIRD DISCOUNTS available – before October 2013!

Price includes excellent food (mostly Thai vegetarian)

BOOK NOW

to ensure your place!

Email Maggi at maggimck@yahoo.com with your preference dates.  I am happy to answer any questions.


Second Workshop:

An Earth Oven (Sally Francis)          5th and 6th February 2014

Photoshop2013 copy

Building an earth oven for master bakers Juergen and Mem of Chiang Dao, this hands-on two day workshop will show you all you need to know about building an earth oven at home.

Workshop taught by Sally Francis www.ecorefab.co.uk an experienced natural builder who works professionally with natural products for decoration, refurbishment and building, to ensure good health and benefits for her clients and the environment.

Contact Sally sally@ecorefab.co.uk

Cost:  £70 (including food)

Early Bird (before October 2013)  £60!


Third Workshop:

Earthbag Dome (Paulina Wojciehowska)             10th to 18th February 2014

2014

Taught by master natural builder Paulina Wojciehowska  www.earthhandsandhouses.org  Building with Earthbags or Superadobe.  A rare opportunity to build a 4m diameter dome which will be used as a space for contemplation and meditation.  The workshop will include foundations, making the dome and arch, and some clay plastering.  After this workshop there will be an opportunity to stay on as a volunteer and participate in finishing the dome.

For more information email Paulina at info@EarthHandsAndHouses.org or phone UK 01825 713349

Cost:

360 Euros

Other Information:

Accommodation:     

There are good guest houses (mostly about £10 – 20 per day or monthly rates £50 – 120) in walking or bicycle distance.  (Need to be booked in advance as this is the busy holiday season in Thailand.)

If there are enough people who would like to camp on site, this could be arranged (turning existing dome into dormitory) or bring own tents and sleeping bags.  Warning: it is COLD at night!

Chiang Dao:

There are plenty of lovely experiences to enjoy in Chiang Dao – weekly market with people coming down from the mountains to buy and sell local products – hot springs – wonderful walks – 2 day climb up Mount Chiang Dao (2175 meters) – visit an elephant camp.

How to Get to Chiang Dao:

Nearest airport – Chiang Mai.  Many flights daily from Bangkok.

Nearest train station – Chiang Mai, day or night train from Bangkok.

From Chiang Mai to Chiang Dao (Hour and half) – Bus or aircon mini-bus from Chang Puek Bus Station (approx every half hour – last bus about 4.30 pm)

Aircon taxi from Chiang Mai International Airport to site appox. £30

Coach from Bangkok to Chiang Dao.

From Chiang Dao to site (10 minutes) – Yellow ‘song taew’ (converted pick-up truck) to Chiang Dao Roundhouses (or to your guest house).

If you get lost, phone Maggi 0874961571

Creating a Swimming Pond

A swimming pond is a pond that you can swim in, a pond with water lilies, bulrushes and tadpoles around the edge, keeping the water oxygenated and clean, with a swimming area in the middle for you to wallow in cool chemical free water while you admire Mount Chiang Dao.

Inspired by David Pagan Butler’s DVD www.organicpools.co.uk and galvanised into action by the heavy rain as the monsoon begins, we took a couple of weeks off from domes to get the plastic in the hole in the ground so that it can fill up with rain.

Finding the level for the water

Finding the level for the water

The first step was to find the level for the water when the pond is full, and for the inner submerged wall separating the planted area from the swimming area.  As we are building on a slope, we decided to build up the lower area to make sure there would be a good amount of water in the centre, which will be just over a meter deep.

Building up the bank on the lower part of the slope

Building up the bank on the lower part of the slope

This will not be the kind of pool for swimming lengths, more a pond to cool off in during hot afternoons.  I can see myself sitting on a step up to my shoulders in cool water, watching the clouds swirl around Mount Chiang Dao.

And so steps are essential!

Building steps into the earth wall of the swimming pond

Building steps into the earth wall of the swimming pond

We used polypropylene bags filled with a mix of dry sand, stones and cement to make building blocks.  When wet the mix should set into concrete, and when the bags disintegrate, as they eventually will, we can always add some mosaics or pebble in some patterns above the water line.

Rolling out the plastic lining for the pond.

Rolling out the plastic lining for the pond.

This was the thickest plastic I could find.  However, it is sold to make fish ponds for the commercial cultivation of fish, so I presumed it would be OK for a gentle swimming pond.  We put down three layers, just to be sure!

Everything is a source or fun for a puppy!

Everything is a source or fun for a puppy!

Sand bags hold the plastic in place.

Sand bags hold the plastic in place.

Not a moment too soon – down came the rain!

Mount Chiang Dao disappears completely in a rain cloud.

Mount Chiang Dao disappears completely in a rain cloud.

With rain water already gathering, we put sand into the bottom of the pond.  This made it easier to walk on and fix the plastic into place, and hopefully will make a ‘mirror’ for reflexions in the pond.  I made the choice not to have black plastic, and chose opaque instead, as I think the sky and plants reflecting in the pond should make the water an attractive colour.

The next step was to make more bags of concrete mix at high water level, and also for the submerged wall separating the planted area from the swimming area.

Working on the blocks separating the planted area from the swimming area.

Working on the blocks separating the planted area from the swimming area.

Waiting for the rain to fill up the pond!

Waiting for the rain to fill up the pond!

And this is as far as we went.  Now it is a matter of waiting for the rain to fill up the pond.  I also intend to bring some water from a nearby clear water pond that is well established, so that natural micro organisms can start working in this pond of mine.

Next week – back to the Domes again!

Back to the Domes

The last couple of months I have had to focus on getting a home built.  It’s not finished yet, but it’s very liveable!

My front porch

My front porch

Now it is back to the Domes.

Where we left off was covering the domes with a layer of concrete.  However, one layer was definitely not enough.  I wasn’t expecting it to be, but was still a bit alarmed at how wet the bags of rice husks became inside the roof of the dome.  In the first dome, the one that we had begun to plaster with mud and straw, lots of the inside plaster fell off.  In the second, without any plaster, the wet bags made the room noticeably damp.

Luckily it did not rain for quite a number of days and the mud and bags dried off beautifully.

While the inside was drying out, we covered the top of the domes with plastic, then a layer of chicken wire, and then another layer of concrete.  By the time the rain began again we had waterproof domes!

A layer of plastic goes on the roof of the dome.

A layer of plastic goes on the roof of the dome.

You can see the chicken wire on top of the plastic, all covered with a layer of cement.

You can see the chicken wire on top of the plastic, all covered with a layer of cement.

The next step was to put the final finish on the domes.  Mixing a colour roughly similar to the colour of the earth that will form the plaster on the walls, we used the same method as the floors in my home.  Only this time we added some ‘stardust’.  Little 1” x 1” mirrors and blue glass pressed into the final coat of polished cement.

Working on the final coat on the dome – polished cement and  ‘stardust’

Working on the final coat on the dome – polished cement and ‘stardust’

The top of the dome is finished with a couple of layers of polyurethane.  I expect this will have to be done every couple of years.

The top of the dome is finished.

The top of the dome is finished.

From the picture above you can see bits of bamboo sticking out from just under the cemented bit of dome.  This is in preparation of an eave, to protect the inside of the dome from the hot midday sun, or the monsoon rain.

In the picture below you can see that more bamboo has now been woven into the eave.

Working on the woven bamboo that will form the base of the eaves.

Working on the woven bamboo that will form the base of the eaves.

The next step is to add some reinforcing steel to give the eave(s?) the shape I wanted.  Then plywood was put underneath as you can see in the background of the picture below.

Kwan Yin, the Goddess of Infinite Compassion, has a home in the garden.

Kwan Yin, the Goddess of Infinite Compassion, has a home in the garden.

The eave over the porch in the front of the dome is supported by two second-hand teak posts.

The eave begins to get its shape.

The eave begins to get its shape.

At the back, the bathroom will be supported by a semi-wall.

Building the bathroom semi-wall.

Building the bathroom semi-wall.

The bathroom will have a half roof, so that you can have a shower out in the open, under the sun and the moon, or under the roof if you prefer.  The wall is dotted with bottles, cut short, joined together with tape, and inserted into the wall, bringing more light into the area.

Half the bathroom wall has been plastered.

Half the bathroom wall has been plastered.

The monsoon is really setting in and I am worried that the swimming hole will fill with earth.  So as we now have two waterproof domes, we are taking a week off from domes to get the plastic lining into the natural swimming pond – next Blog!

Sleeping in a Roundhouse Bedroom.

The second ‘room’ is ready and I have moved in and sleep very well in there.

I think we need a new vocabulary! The second something is round and it is a bedroom and it is part of a roundhouse that will have a few round somethings connected by covered walkways. But it’s not a room in the conventional sense as it is completely separate. But it is not a separate ‘roundhouse’. Any ideas, anyone?

Building the frame for the thatch.

Building the frame for the thatch.

Putting in the frame for the covered walkway between the two roundhouse rooms.

Putting in the frame for the covered walkway between the two roundhouse rooms.

We had to go and find some very long and strong bamboos to form the walkway roof between the two roundhouse rooms.

Toni and Sophia check out the newly arrived thatch.

Toni and Sophia check out the newly arrived thatch.

At this point I mistakenly deleted a batch of photos as I transferred them from camera to computer! But if you have followed my previous blogs, you will know how the walls and roof are created (if not, check out Blog 9 ‘Sweet Home, Chiang Dao’). So on to the finished roundhouse bedroom.

My roundhouse bedroom is almost finished.

My roundhouse bedroom is almost finished.

The photo above shows that this was the day the electrics went in. The wires will be encased in yellow pvc, which will be hidden by the earth plaster that will eventually go on the walls.

You can also see the stones in front of the ‘room’ that mark a French drain. As the house is on a slope, and in a monsoon area, rainwater is a hazard. Both the
‘rooms’ will have French drains at the side where the slope is steepest. A ditch about 40 centimetres deep is dug, and a 4 inch pvc pipe with holes in it laid at the bottom, and the ditch then filled in with rounded river stones. Since this photo, it has rained quite heavily and the drains worked perfectly!

Covered walkway between the two ‘rooms’.

Covered walkway between the two ‘rooms’.

The walkway works very well, and is wide enough for stormy weather. Note the stones denoting another drain which carries the rain water from the thatch away from the house to the vegetable patch further down the slope.

Our littlest worker helps her mum dig the ditch for the French drain.

Our littlest worker helps her mum dig the ditch for the French drain.

One of our workers is from the Lisu hilltribe, and he recommended using this style of drain from the bathroom, especially as I am now showering in there. The drain filled with pebbles takes the water away, leaving ‘steps’ in between that stay dry. I only use products with no chemicals so the water that comes from the shower is fine for plants, and we have planted seeds from a delicious papaya at the end of the drains.

Interesting ‘steps’ between drains from the bathroom.

Interesting ‘steps’ between drains from the bathroom.

You may have noticed the bottle of gas in the picture above. I had installed a gas hot water heater in the house that I rented, so when I moved here, I brought it with me. But the water pressure here is very erratic, and half the time it is scalding hot, and the rest of the time, cold! So I now have a big bucket and mix the hot and cold together and slosh is over myself with the aid of a bailer.
It works fine. One day I will get down to sorting out the water situation, but there’s some building to finish first…

Rain clouds gather over Chiang Dao Mountain: view from my hammock.

Rain clouds gather over Chiang Dao Mountain: view from my hammock.

The rains seem to be finally here, though we are still having dry weather some days I’m happy to say.

I decided to do something different for the floor of the bedroom. We have used green pigment in the final cement plaster, and then I painted a design using red acrylic roof paint. A final layer of polyurethane seals the concrete and makes it easy to keep clean.

I used red acrylic roof paint for the design on this floor of polished green concrete.

I used red acrylic roof paint for the design on this floor of polished green concrete.

Toni had a snooze on the painted floor!

Toni had a snooze on the painted floor!

Such a lovely room to sleep in!

Such a lovely room to sleep in!

My two roomed roundhouse, or should it be my two roundhouses??

My two roomed roundhouse, or should it be my two roundhouses??

Note the step and drain walkway to the ‘bedroom’, to give me dry stepping ‘stones’ (more vocab problems…) as water drains down from the slope. I love this idea!

And finally, introducing Lucy, my little red poodle!

Introducing Lucy.  I think Toni is in love…

Introducing Lucy. I think Toni is in love…

Sweet Home, Chiang Dao

My new home.

My new home.

I am in my new home! Me and Toni and the kittens moved in a couple of days ago and we all love it! At the moment we are squashed into one roundhouse, but the second is now underway and hopefully it will only be a week or so before we that will be ready for habitation, and we can spread out a bit.

We have been really busy these past two weeks. This is where I left off in the last blog – thatching.

Attaching the thatch to the bamboo roof structure.

Attaching the thatch to the bamboo roof structure.

A day later and this is where we were.

Forming a chain to get the thatch up to the top of the roof.

Forming a chain to get the thatch up to the top of the roof.

And on goes the top-knot!

The final piece of roof – a top-knot.

The final piece of roof – a top-knot.

The roof it now complete! It is very beautiful inside and the new thatch smells wonderful.

The completed roof.

The completed roof.

Inside we are preparing gravel bags for the first layer of the wall…..

Preparing bags of gravel for the first layer of wall.

Preparing bags of gravel for the first layer of wall.

…while the littlest worker takes an afternoon nap.

Littlest worker taking a nap.

Littlest worker taking a nap.

Do you remember my first blog when I was looking for a tractor to do some digging and couldn’t find one? Well, I was driving back to my rented house the other day when I saw a machine digging a ditch at the side of the road. Just what I needed! I stopped the truck and hailed the digger driver. He agreed to come and dig my swimming pool, and turned up last week and got the job done in just a couple of hours. It would have taken a week for half a dozen people to make the same hole.

Digging my ‘natural’ swimming pool.

Digging my ‘natural’ swimming pool.

As you can see it is not a huge swimming pool, but should be great for cooling off on hot afternoons. It’s going to be fun finding water plants to surround it. They will keep the water clean without having to use chemicals… theoretically. I am sure it will take a bit of experimentation as so far most natural swimming pools on the internet seem to be in temperate climates. I got the idea from David Pagan Butler who has made a great DVD on how to go about creating a natural swimming pool.

My swimming pool.

My swimming pool.

Do you see that great pile of wonderful red earth on the side? That is going to be used to build an earthbag dome, when Paulina Wojciechowska (earthhandsandhouses.org) comes to Chiang Dao in February 2014 to run a workshop! You heard it first here….

The electric cable goes into the earth.

The electric cable goes into the earth.

Meanwhile, the electrician has been hard at work connecting me up to the line which, luckily, runs down the road in front of the property. My workers are digging the ditch for the cables, which will all be underground so that our views will not be interrupted by strings of wires.

Walls and roof completed.

Walls and roof completed.

The bags of rice husks are complete, with a gap left at the top of them underneath the roof for the air to circulate through the roundhouse (perfect for kittens to play on). This house is actually more of a hexagonal than round house, which makes it a very interesting looking building. Note the ceiling light, an upside down birdcage lined with batik.

We are not going to cob the walls yet – I need to move in as soon as possible. I plan to drape bits of cloth over the bags until the time is right to finish off the building. Outside, the lower bags will have a piece of plastic tucked around them to protect against driving rain should we get any – the monsoon is terribly late this year!

It’s turning out to be a good idea to have built my house now, as I am using it as a place to experiment. Look at the lovely terracotta coloured floor. Hard to believe it is concrete… This picture also captures the hexagonal shape of the walls.

Terracotta coloured floor.

Terracotta coloured floor.

The light shines through the coloured glass and makes patterns on the polished floor.

The light shines through the coloured glass and makes patterns on the polished floor.

I found this old door in the second hand wood shop, leaning sadly against a fence outside, with only two of its original teak wood panels left. I had this coloured glass put in. It is modern glass but copied from the old style of Thai window glass.

So here we are in our new home! Toni and the kittens look perfectly comfortable.

Toni and the kittens at home in their new home.

Toni and the kittens at home in their new home.

My hammock is up on the porch. Now I am really at home!

My hammock on the porch.

My hammock on the porch.

Home Sweet Home.

Home Sweet Home.

Sweet Home, Chiang Dao.

Building My Dream Home

I have been dreaming about building a home to live in, on this land, for 8 years now. My plan is to have four domes to live in: a living dome, work dome, sleeping dome and kitchen/bathroom dome. BUT the landlady of the house that I am renting asked me to move out – in a month!

It’s a good thing I am a flexible kind of person… I don’t have time right now to build according to my ‘plan’, so I shall just build 2 of the 4 domes. I will use our existing open-air bathroom on the site, and let’s face it, I don’t cook anyway….

So this blog shows the first 2 weeks of the new build.

Clearing the undergrowth in preparation for my new home.

Clearing the undergrowth in preparation for my new home.

The preparation for the first structure was not too arduous as it is on the only bit of flat ground on site, the place where a previous owner had a home many years ago.

My living room foundations are underway.

My living room foundations are underway.

Fixing the bamboo trellis to strengthen the concrete foundation.

Fixing the bamboo trellis to strengthen the concrete foundation.

The second structure ground preparation was a real challenge! Not only was the top-soil about 2 feet thick, but also there were deep holes all over it where some creatures have been living. I have not yet been able to understand what creature it is…..

Preparing the ground for the second room

Preparing the ground for the second room

Because of the time constraints, we are going to put bamboo and thatch roofs on these two structures. The ‘sausage’ bags of rice husks take a week to attach in a dome, and then the top of the dome needs to be waterproofed, another week at least. The bamboo poles on which to attach the thatch in this dome took a day to complete and the thatch should, I hope, take 2 days.

So these two structures will be roundhouses, rather than domes, but can be converted into domes any time in the future.

The first bamboo poles go up.  You can see the second roundhouse foundations behind, down the hill.

The first bamboo poles go up. You can see the second roundhouse foundations behind, down the hill.

The thatch is being made by a woman in the village with the help of all her female relatives. I followed local advice that if it was made especially for you it would last a lot longer than if just bought in a shop.

The structure is ready for the thatch.

The structure is ready for the thatch.

The round thingy in the middle in the picture above is the metal bit from an old car tire which we found in the local recycling yard. I bought 2 of these some time ago, thinking they may come in useful as surrounds for skylights, and had not yet used them, luckily!

The ‘birdcage’ which will support both the thatch and rice-husk-bags.  Littlest worker is playing with an old cow bell hanging on a red string.

The ‘birdcage’ which will support both the thatch and rice-husk-bags. Littlest worker is playing with an old cow bell hanging on a red string.

Interesting detail showing how to hang bamboo poles.

Interesting detail showing how to hang bamboo poles.

In order to hang the bamboo poles on the porch roof, holes were cut into the top of the poles and a thin piece of bamboo threaded through them. I’ve never seen that done before!

The roof is leaning to the right!

The roof is leaning to the right!

Horrors! We arrived this morning to find the roof had sort of twisted a bit and leaned over to the right! Luckily it did not seem too difficult to put right…. forever?!

The first strips of thatch go up.

The first strips of thatch go up.

So exciting!

Note the broken window …well, you probably already did! There are two windows the same, so this one is on site just to get the surrounds right, and the one that will be there permanently is having glass put in.

Worker Bann shares his ice cream with Toni.

Worker Bann shares his ice cream with Toni.

The home made ice cream vendor is doing great business in this very hot weather! He knows he is always welcome on site on hot afternoons….

Next blog in 2 weeks – I should have moved in by then! My dream of living on my land is coming true much quicker than I expected. Do you have a dream? Are you on the way towards it? I would love to hear about it!

Amazing Speed!

It was really quite astonishing how fast the second dome, the Jungle Dome, went up now that we know what we are doing! While a layer of concrete and rice husks was going on the Blue Moon Dome, a couple of people were working on the base of the second dome.

The base of the Jungle Dome gets a concrete surround for termite and rain water protection.

The base of the Jungle Dome gets a concrete surround for termite and rain water protection.

All hands were on deck when it came to constructing the bird cage. And it went up so easily, and much more securely, than the Blue Moon bird cage.

The team constructs the Jungle Dome bird cage.

The team constructs the Jungle Dome bird cage.

We have finished all the useable bamboo on site, though luckily it grows really quickly and by next year we should have plenty. For now we have to go to bamboo ‘orchards’ to cut what we need and pay for it (10 Baht per piece).

Loading the bamboo onto my trusty truck.

Loading the bamboo onto my trusty truck.


Bamboo lattice completes the bird cage.

Bamboo lattice completes the bird cage.

In the Blue Moon dome hemp string was used to tie the bags onto the bird cage. However, this can only be bought in the city of Chiang Mai, and it was not that strong. So this time we used the Thai favourite string, and colour!

Our littlest worker helps prepare the string to attach the bags to the bird cage.

Our littlest worker helps prepare the string to attach the bags to the bird cage.

I can’t believe how much easier, and faster, this second dome is going up! This is the second day of ‘bagging’.

The second day of ‘bagging’.

The second day of ‘bagging’.

Note the neat way the window fits into the structure, when compared to the trouble we had with the first dome windows (note for Niko, Sally and Will!).

We decided to put a number of glass bottles in the roof as they looked so good in the first dome. This means finding the bottles, cutting them in two, and joining the bottom halves. The worry is that water will get in around them, so old bicycle tires were cut up to make sort of washers around the ends.

Plenty of bottles to choose from at the local recycling yard.

Plenty of bottles to choose from at the local recycling yard.


The last bags and bottles are in the roof of the Jungle Dome.

The last bags and bottles are in the roof of the Jungle Dome.


Beginning to cover the roof of the dome.

Beginning to cover the roof of the dome.

And the Jungle Dome gets its first covering of straw dipped in cement and water. Note the lovely shape of this dome!

I had a shock a few days ago. My landlady said that she wanted her house back in a month!

I raced around looking for other places to rent, but nothing seemed right. So I decided to go ahead and build a place for myself on site. As I am working to a time table and my own place is right at the end of that table, I need to build something that will go up quickly, so the plan is to make the foundation for two domes, but walls and roof of bamboo and thatch. Then later I will change this to a rice-husk-bag and earth structure – probably of 4 connecting domes.

So the next blog will be of our race to get me, Toni and the kittens a place to stay – in less than 4 weeks!

Glorious Mud!

Mixing the wonderful red clay that we have on site with water and lots of straw. It is cool in the dome and the mud and straw mix is cool too – and it’s very hot outside!

The first stage is to make the mix of much and straw (see blog ‘A Feast for the Spirits of our Land’ on where the straw came from) and this we did in the big plastic bowls in the picture below, using our hands and feet. Then the spaces between the bags are filled with the mix, and then the cob is plastered all over the inside.

Note the glowing green circle on the wall. Bottles were cut in half (not easy!) and joined together and put into the wall to add some interesting touches of light.

Big bowls to mix the mud and straw.

Big bowls to mix the mud and straw.

Friends came to help!  Everyone loves with mud...

Friends came to help! Everyone loves playing with mud…

Working up high in the dome is not something everyone can do! Our workers seem to be having fun!

Workers enjoying their work!

Workers enjoying their work!

On the outside of the dome much the same process happens, except we are using a mix of cement and water, and dipping straw into that, to fill in all the spaces between the bags.

Pulley system to take buckets of straw dipped in a mix of cement and water to the top of the dome.

Pulley system to take buckets of straw dipped in a mix of cement and water to the top of the dome.

Then a mix of cement, sand, water and rice husks goes on, making a waterproof cap. Those pipes you can see sticking out of the dome in the picture below will be air vents to make sure that the dome always has fresh air, even when doors and windows are closed.

The Blue Moon Dome with its concrete cap.

The Blue Moon Dome with its concrete cap.

The Festival of Songkhran is about to begin. This is when everyone throws water at each other and probably began as a ritual to summon the rain, as the dry season is in full force with soaring temperatures and forest fires. We felt we needed to get a waterproof cap on our dome quickly, as the rains can begin any time after the Festival.

We are also hard at work on getting the next dome up and capped before the monsoon begins. This dome is bringing surprises as you will see in the next Blog.

Tess and Toni outside my kitchen door.

Tess and Toni outside my kitchen door.

I am very sad to have to tell you that Mickey Mouse (see blog Spirits Abound) was run over a few days ago.  We miss him.

Termites are Trouble

Termites! They can find wood anywhere – but they don’t like teak. A friend of mine had a teak wood house, but her kitchen cabinets were not built of teak. The termites found their way up over the concrete base (built to keep them out!) under the teak wood wall, and into the kitchen at the back of the cabinets and proceeded to munch away until finally there were so many of them that the sound alerted my friend!

I have had a ceiling fall down on me – the termites had chewed through the wood frames of the ceiling panels!

A termite mound at the bottom of the garden, about 50 cm high.

A termite mound at the bottom of the garden, about 50 cm high.

What to do?   Well, use as little wood as possible and use teak.  But teak must be about the most expensive wood there is….

About a half hour drive away along a lovely road through the jungle by the side of the River Ping, there is a shop that sells second hand teak.  It is run by a woman who used to sell pork in the market, but switched to buying old teak houses (many Thais prefer to have modern concrete houses) and breaking them up and selling the wood.

So this is where I do my wood shopping.  Not only pieces of wood for window and door frames, but even the windows and doors themselves.

Old teak window sitting on rice-husk-bags, set in a bamboo frame attached to the ‘bird cage’.

Old teak window sitting on rice-husk-bags, set in a bamboo frame attached to the ‘bird cage’.

After the windows and doors are attached to the bird cage the rice-husk-bags continue up the walls.  Then a point is reached where the dome begins to lean in.  The bags, though not heavy in comparison to earthbags, were heavier than I was happy with to be attached to the roof, with gravity pulling them down.

So volunteer Su Lupasco Washington designed a way of folding a sausage-like bag one third the thickness of our regular bags.  The bags continued up into the dome and finally covered the inside of the whole structure – and the temperature inside the dome immediately dropped!

The last ‘sausage’ bags going up into the dome.

The last ‘sausage’ bags going up into the dome.

Su also wove some bamboo shelves which will be covered with cob.

Su Lupasco Washington weaving bamboo shelves.

Su Lupasco Washington weaving bamboo shelves.

Outside the front door of the dome we made a porch, the perfect place to sit and admire the view of the mountain, Doi Chang Dao.   The roof of the porch, formed by an extended eave from the dome, will be balanced on two lovely old teak tree trunks.

Setting an old teak post into position on what will be the porch.

Setting an old teak post into position on what will be the porch.

In the photo above you can see that part of the foundation for the porch is made from earthbags.

The porch becomes a reality.

The porch becomes a reality.

The step up from the porch into the dome is Su’s!    She created a fabulous mosaic in blue, and we shall name the dome ‘Blue Moon’.

Su transferring her design onto the step, piece by careful piece.

Su transferring her design onto the step, piece by careful piece.

And back at home two new additions, kittens Widget and Sophia.

Toni and Widget tentatively checking each other out.

Toni and Widget tentatively checking each other out.

Next Blog – finally – we get to play with mud!


Building a Giant Bird Cage

The two biggest challenges for building with natural materials here in Thailand are termites and the monsoon.

To tackle the termite problem, I consulted my natural building books, got on to Google, and talked to a great many knowledgeable people, including Paulina Wojciechowska (Earth Hands and Houses). Finally I made the decision to build on a concrete base.

A trellis of bamboo makes a strong foundation on which to pour the concrete.

A trellis of bamboo makes a strong foundation on which to pour the concrete.

We needed something to attach the bags of rice husks to.  Unlike earthbags which are heavy and do not need a frame, rice-husk-bags are light weight and a stack of them one on top of the other would tumble down should you mistake them for earthbags and lean against them.  But they would be soft to fall on.

Building the Bird Cage.

Building the Bird Cage.

We built a frame using thin steel bars.  Finding the exact shape for the dome roof was interesting.  We used a long thin bamboo pole and there was a lot of ‘down a bit’ ‘up a bit’ until it felt right.  Then we covered the whole dome with a bamboo trellis.  The ‘bird cage’ was ready for the bags.

Preparing the bamboo trellis.

Preparing the bamboo trellis.

Then the first layer of bags was set on to the concrete base.  We had stuck some pieces of steel bar up from the concrete floor so that the first bags could be lowered on to them and secured into position.  Sally Francis was luckily on site volunteering at this stage, and with her experience of earthbag building she was able to advise us.  The first layer of bags was filled with gravel, and the second with sand.  This is to prevent any moisture leaching up from the ground through the concrete.  Or if there was a massive monsoon deluge, the water could theoretically course through the building and out the other side.

Filling the first layer of bags with gravel.  That’s me in the hat.

Filling the first layer of bags with gravel. That’s me in the hat.

Rice-husk-bags followed, one on top of the other up the sides, each tied securely to the trellis with string made of hemp.

Rice-husk-bags tied securely to the trellis.

Rice-husk-bags tied securely to the trellis.

And finally, a picture of Toni in a ‘bucket’ thingy that is used for carrying earth.

toni, 2_2013